


Amadeus
 09-07-2015, 08:26 PM
#101

Thread Starter
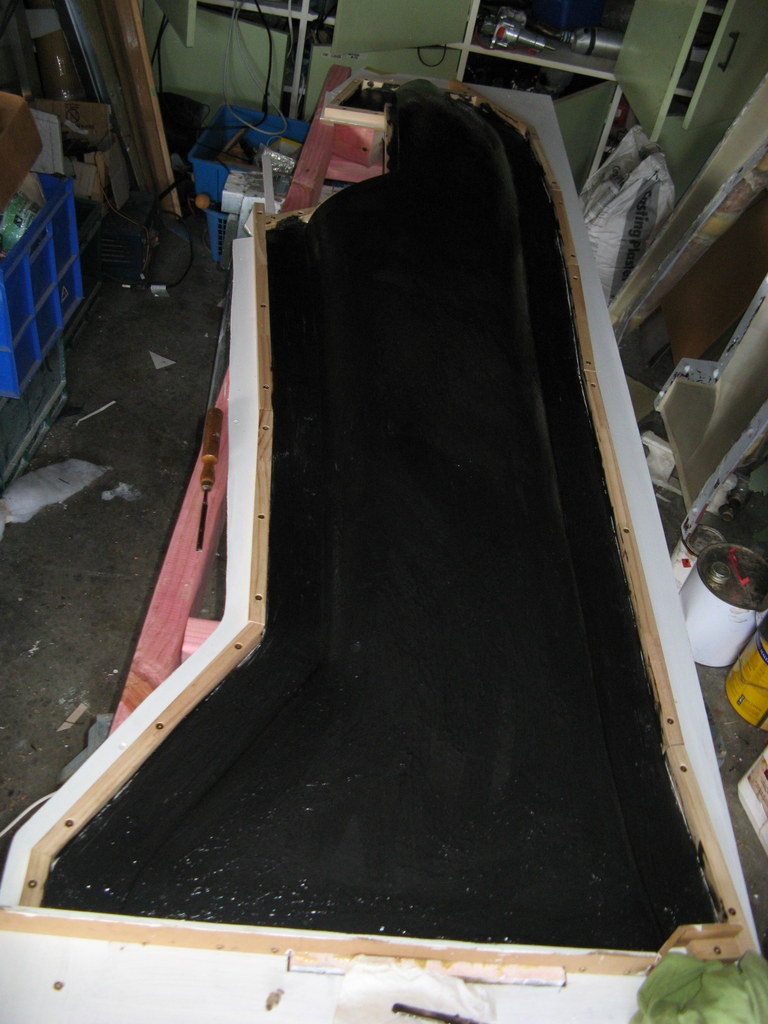
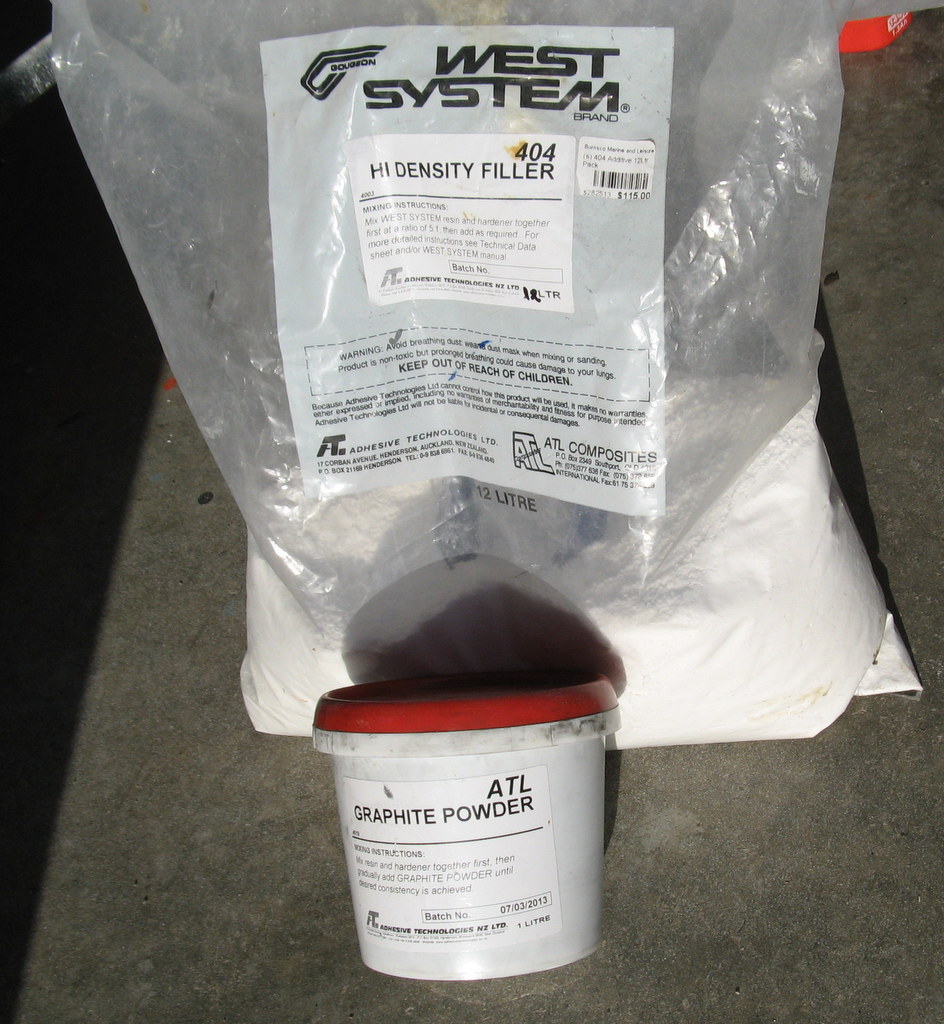
Applied the first gel coat. This will be an all epoxy mold. The gel coat is made by mixing West 404 high density filler and graphite with epoxy. The mixture is filler 30% of resin weight and graphite 7% of resin weight. This is a fairly thick mixture and is brushed on. I am going to apply 3 layers of the gel coat. Now that I have started this process I need to apply each layer before the preceding one fully cures so as to get a molecular bond between the layers. That means another coat tonight and another tomorrow morning etc.etc.


 09-08-2015, 03:13 AM
#102
Thread Starter
Got the second gel coat on. Put some white epoxy pigment in it so I could make sure of full coverage. Will need to do the next coat first thing tomorrow morning,


Last edited by RodneyFord; 09-08-2015 at 02:52 PM.
09-08-2015, 02:49 PM
#103
Thread Starter
Applied another gel coat and 2 layers of 80gm glass while the gel coat was still wet. I use quite small pieces of glass mostly cut on the bias. This makes it easy to go around all the sharp corners. 40% Slick 360 in the background getting some work done on it.

Last edited by RodneyFord; 09-08-2015 at 02:52 PM.
09-09-2015, 12:41 AM
#104
Thread Starter
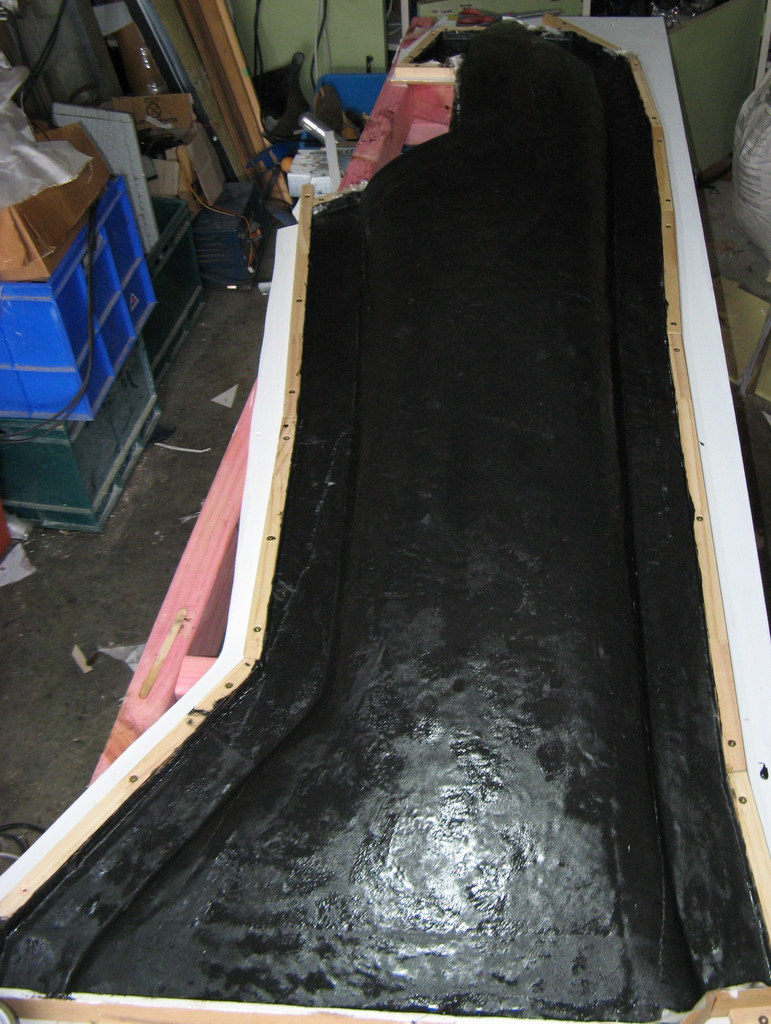
3 layers of 200gm glass. First I apply a coat of epoxy with some filler powder in it so as to get a seamless bond between layers. I use a heat gun as I apply each layer of glass to help the resin migrate between layers.

09-10-2015, 11:36 AM
#106
Thread Starter
Hi Graham
I put on more layers last night which finishes that mold half. There are 3 layers of gel coat, 2 layers of 80 gm glass and 5 layers of 200 gm glass as well as 2 extra layers of 200 gm glass on the flanges. Also because I used strips of glass from 100 to 200 mm wide and various other small shapes which overlapped maybe 20% is double or more layered. I'm going to leave it to cure for a few days before removing the parting plate and starting on the other side.
I put on more layers last night which finishes that mold half. There are 3 layers of gel coat, 2 layers of 80 gm glass and 5 layers of 200 gm glass as well as 2 extra layers of 200 gm glass on the flanges. Also because I used strips of glass from 100 to 200 mm wide and various other small shapes which overlapped maybe 20% is double or more layered. I'm going to leave it to cure for a few days before removing the parting plate and starting on the other side.
09-15-2015, 08:38 PM
#107
Thread Starter
Removed the canopy mold and pattern from the parting plate and support structure to prepare it for the other mold half. Came away easily and cleanly.
10-03-2015, 02:20 PM
#109
Thread Starter
Got the dams on for the other mold half. Will lay it up next weekend. In the mean time am working on my lathe and mill getting set up to make the gearbox.


10-26-2015, 01:30 AM
#111
Thread Starter
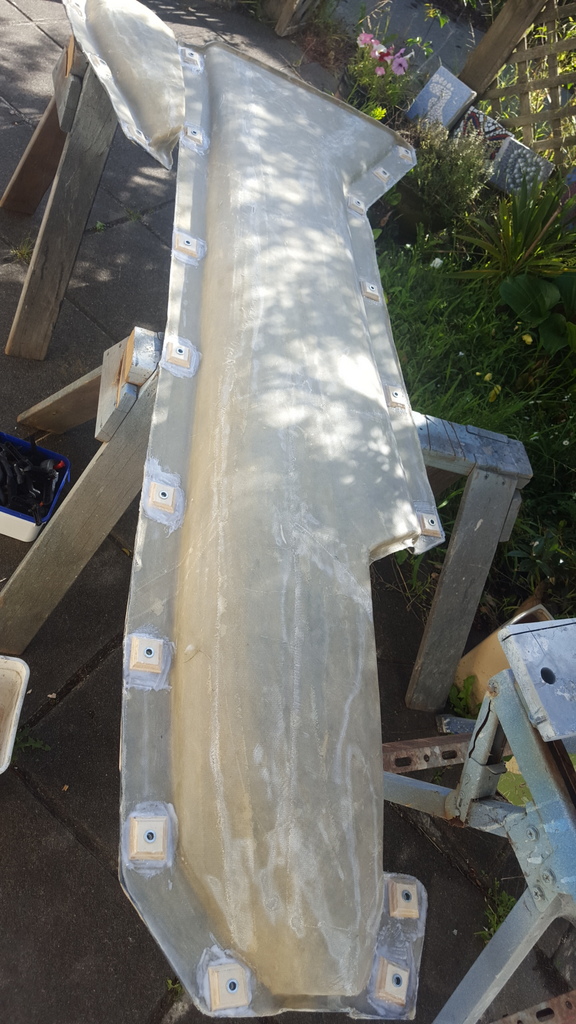
Released the molds from the patterns today. Drilled 9mm holes around the flange to accommodate the 6mm rivnut alignment pins.
The canopy was difficult to release due to the tight corners, the fuselage released very easily.
Mold surface looks great, no bubbles.
The canopy was difficult to release due to the tight corners, the fuselage released very easily.
Mold surface looks great, no bubbles.
01-06-2016, 07:31 PM
#112
Thread Starter
A break from work means more work on the Amadeus. Can also travel up to Ewan's to collect the Rohacel foam so I can mold the fuselage.
Sorted out the wing plan form. Wing area is 1067 sq. in. Foils are S8035 modified 12.5% root 11.5% tip. The trailing edges are slightly thickened about 4.5mm. S8035 has the high point further forwards than the commonly used NACA 63 series foils. Joe Wurts and prof. Selig think S8035 should be a good aerobatics aifoil. Tail is SD8020 as usual.

Sorted out the wing plan form. Wing area is 1067 sq. in. Foils are S8035 modified 12.5% root 11.5% tip. The trailing edges are slightly thickened about 4.5mm. S8035 has the high point further forwards than the commonly used NACA 63 series foils. Joe Wurts and prof. Selig think S8035 should be a good aerobatics aifoil. Tail is SD8020 as usual.
01-06-2016, 07:50 PM
#113
Thread Starter
I have had a CNC foam cutter for 10 years or so. This is the 3rd version. I use the lightest foam I can get 12kg/M3 or 12lb/ft3. I am not going to honeycomb them.
Blocking out.


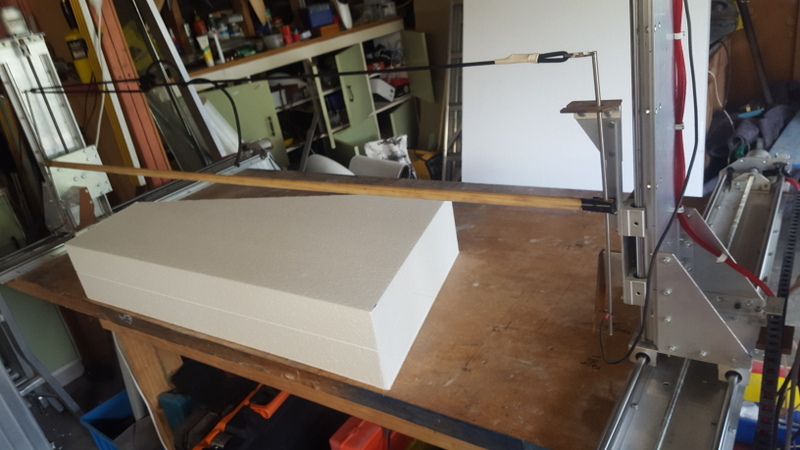
Blocking out.
01-06-2016, 08:00 PM
#114
Thread Starter
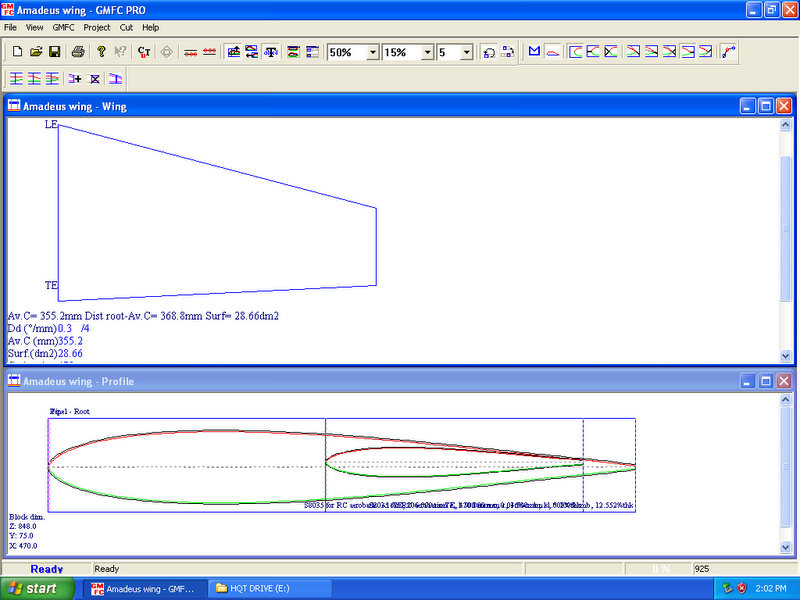
Cutting the cores. Came out perfectly in spite of 2.25/1 taper ratio. Screen shot of GMFC the cutting program.


Last edited by RodneyFord; 01-06-2016 at 08:04 PM.
01-06-2016, 08:11 PM
#115
Thread Starter
Tail planes need the machine to be reconfigured for a smaller bow. I have 4 bows 450mm to 1500mm. The wire is .2mm Inconel.
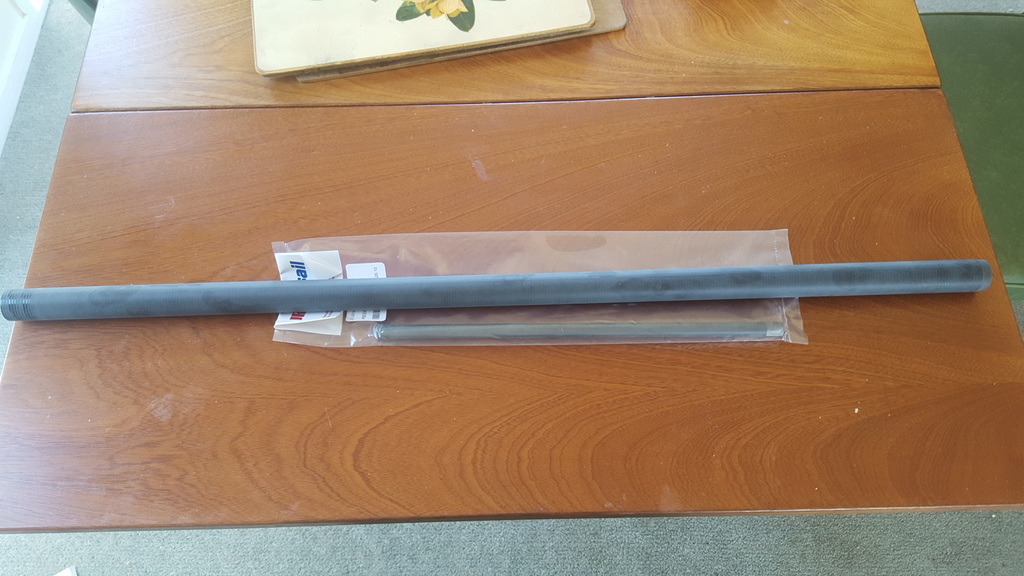
More perfect cores. I will do the rudder shortly. Need to get some carbon tubes. Fortunately PBG tubes are manufactured here in New Zealand.


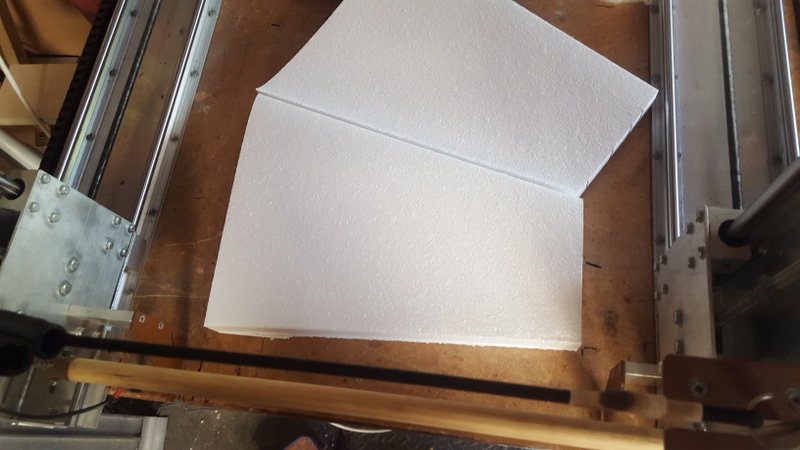
More perfect cores. I will do the rudder shortly. Need to get some carbon tubes. Fortunately PBG tubes are manufactured here in New Zealand.

 01-13-2016, 10:10 PM
#118
Thread Starter
Finally managed to get up to see Ewan.
Ticked lots of boxes.
Signed off the 40% Slick 360 project. (most important)
Picked up a pack of rohacell for fuselage molding.
Checked out the Allure project.
Got enthused watching Hamish practise the F3A pattern.
Had a great time.
Got the Armadeus molds ready to make a fuselage.
Smoothed the flanges and glued on ply/rivnut locators.
PBG wing and tail tubes arrived.
Have also been working on my lathe and grinding rest projects so I can build the contra gearbox.
02-12-2016, 08:16 PM
#120
Thread Starter
Got the first half of the fuselage in the bag. Just the outer 50gm glass and 1mm core. I will do the inner 25gm glass as a separate stage. Hopefully join the halves at the same time with a double lap joint. I used wire mesh as a guide to perforate the core foam.
06-22-2016, 05:00 PM
#121
Thread Starter
Finished work for the time being. Back on Amadeus.
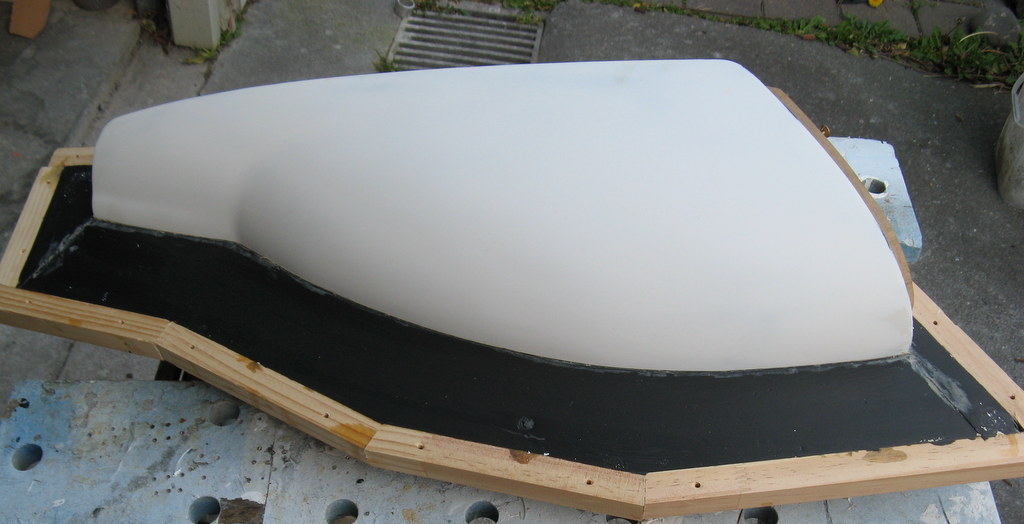
Molded a canopy to get back in the groove.
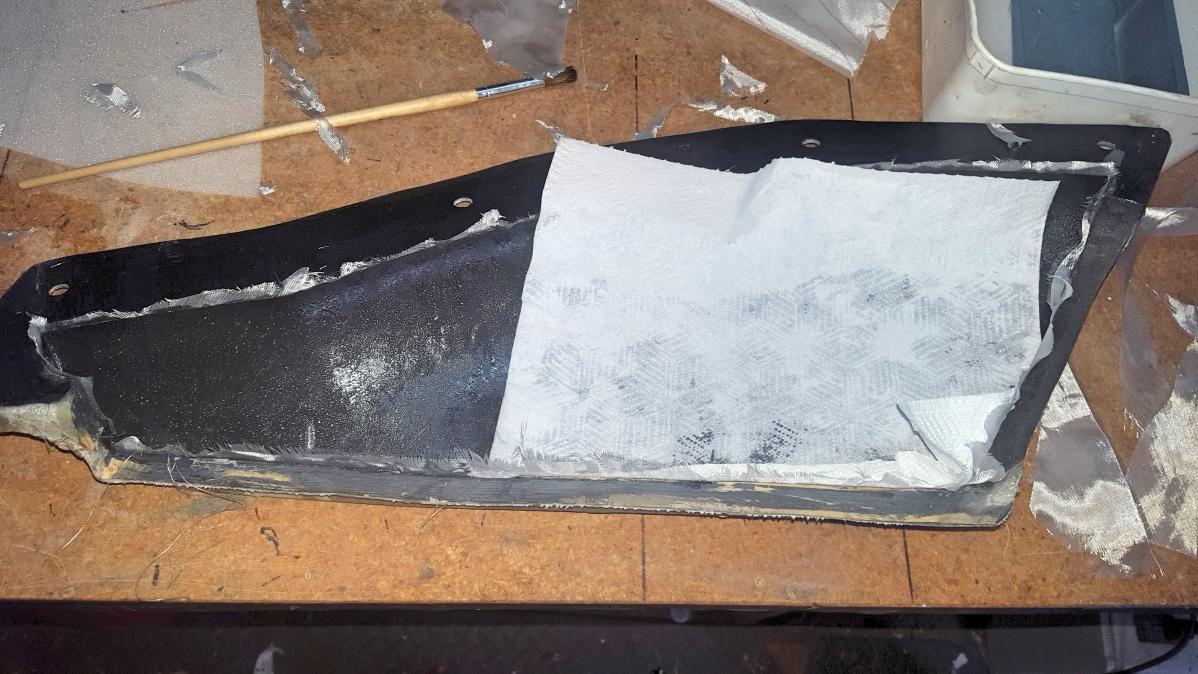
A layer of 50 gm glass outside 1mm rohacell core 25 gm glass inside no gel coat. 200gm carbon joiner and around the flange, 85gm and nice and stiff.
It's OK but could be neater and could also loose 10-15 gm with out most of the carbon.

Molded a canopy to get back in the groove.
A layer of 50 gm glass outside 1mm rohacell core 25 gm glass inside no gel coat. 200gm carbon joiner and around the flange, 85gm and nice and stiff.
It's OK but could be neater and could also loose 10-15 gm with out most of the carbon.
06-23-2016, 06:32 PM
#122
Thread Starter
I am making another canopy to get a better result.
perforating core to allow resin migration

25gm glass on the flanges and 50 gm all over then blotted
Peel ply then breather. I found I don't need release film.

In the bag with plenty of folds to allow the bag to conform to the mold properly.
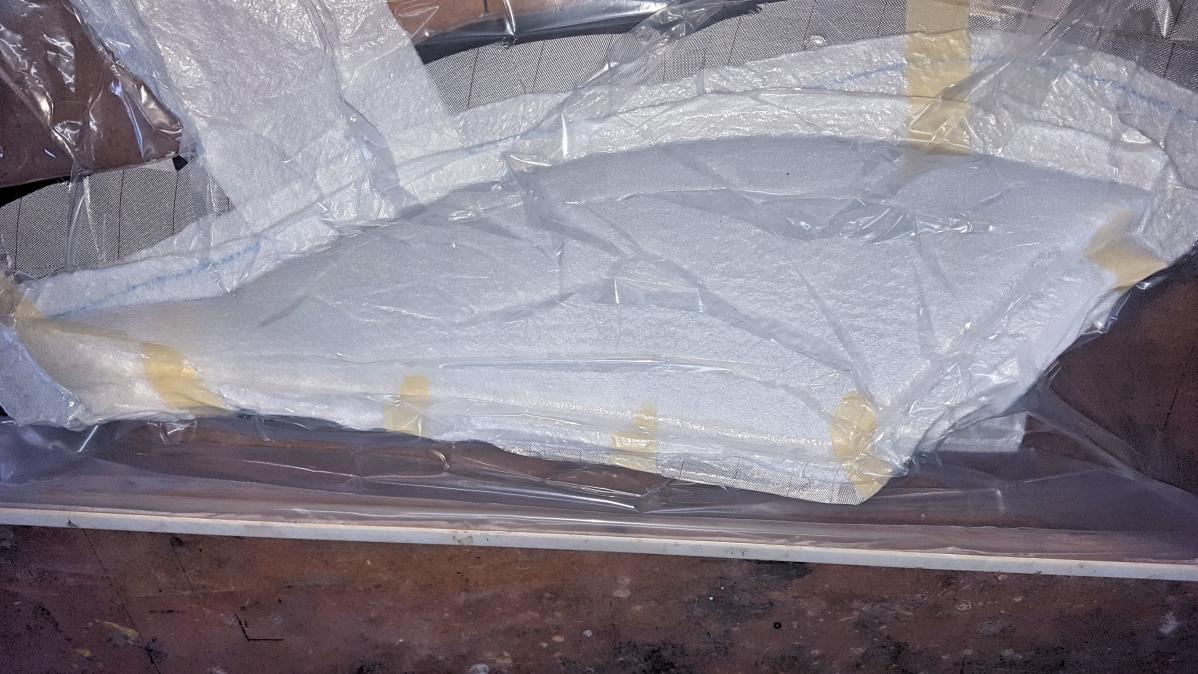
I'm trying an electric blanket to heat the mold. This should promote better resin migration into the peel ply and breather.

perforating core to allow resin migration
25gm glass on the flanges and 50 gm all over then blotted
Peel ply then breather. I found I don't need release film.
In the bag with plenty of folds to allow the bag to conform to the mold properly.
I'm trying an electric blanket to heat the mold. This should promote better resin migration into the peel ply and breather.
 07-01-2016, 03:36 PM
#125
Thread Starter
Thanks Mark. The big difference is the lack of 200gm carbon cloth on the flange and joining. It still needs a little more stiffness in the flange now so I might make one more. A heads up for the fuselage which I will finish off next week.